How to enable class tracking in QuickBooks Online
Using this quick guide shows how to enable the Class feature within QuickBooksⓇ Online in order to use it while working with data.
Overview:
Enable Class Tracking in QuickBooks Online
Launch your QuickBooks Online company and starting from the dashboard please do the following:
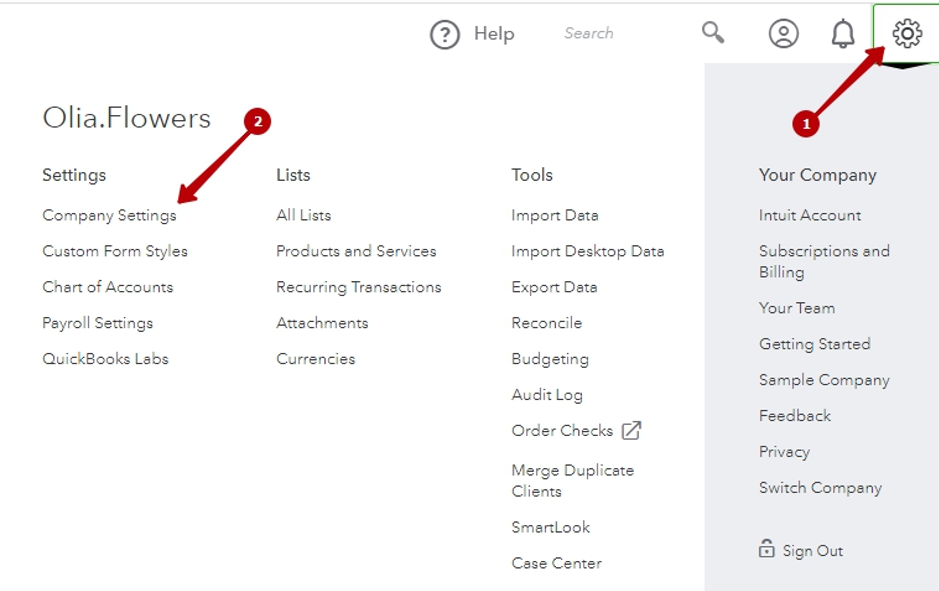
1. Click the Gear button in the upper-right corner of the screen.
2. Click Company Settings (or Account & Settings depending on your QuickBooks Online version).
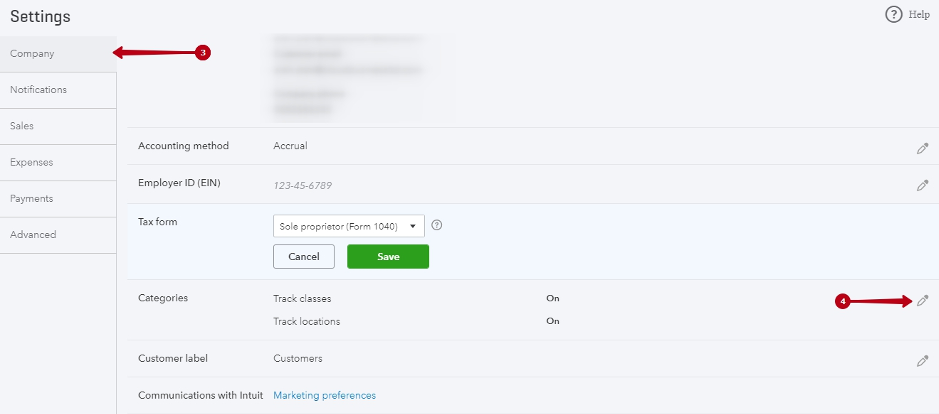
3. Get to the Categories section (again, depending on the version it can be either under the Company tab or Advanced tab).
4. Click the pencil button to edit this section.
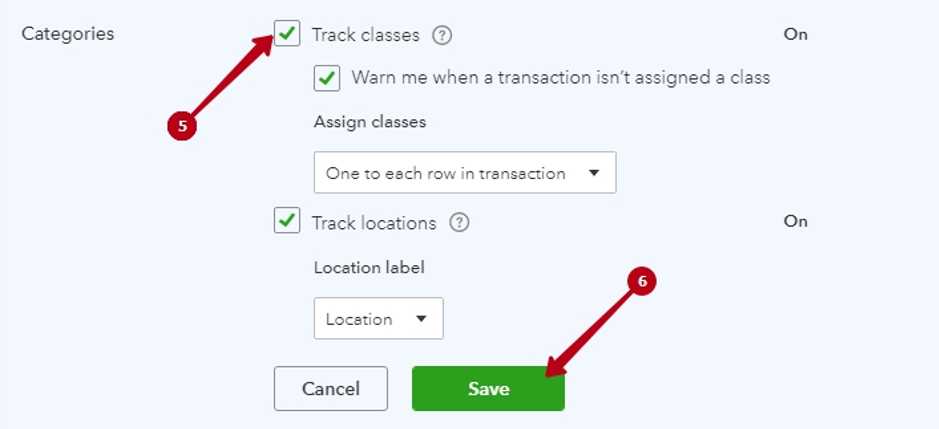
5. Click the Track classes box.
6. Click Save.
Useful tips on the Classes feature in QuickBooks Online
There is an Assign Classes field. Select One to entire transaction if you don’t need to enter a class for each product you sell to a customer.
If you have any questions or suggestions – feel free to contact us in the online chat! Our support number and email are specified in the footer of the page below, we would be glad to hear from you in case of any questions.
Comments open