

Looking desperately for an easy, quick, and reliable way to communicate your PayPal account with your QuickBooks or Xero company? You can stop the search now! The Synder accounting solution is here for you, providing an opportunity to sync smoothly your PayPal transactions and corresponding PayPal fees and PayPal taxes to the accounting software you use. Have your books prepared for one-click reconciliation in QuickBooks or Xero (learn more about our automatic bank reconciliation feature for Xero in this article). The Synder solution also allows multi-currency accounting for your PayPal payments, PayPal expenses, inventory tracking in Synder accounting, QuickBooks or Xero and categorizing the synced data automatically to keep your books up-to-date and accurate.
Amazing, isn’t it? Let’s connect your PayPal account to Synder to automate the bookkeeping process!
Overview:
Start the PayPal integration from scratch
1. Create an account
If you’re getting started with Synder you’ll need to create a free Trial account and connect your accounting system first. Check out this guide if you would like to integrate PayPal with Synder accounting, QuickBooks Online or Xero and this article to connect your QuickBooks Desktop company.
Select the product(s) you are going to use:
- Synder Sync;
- Business Insights;
- Or both of them for perfect control of your business.
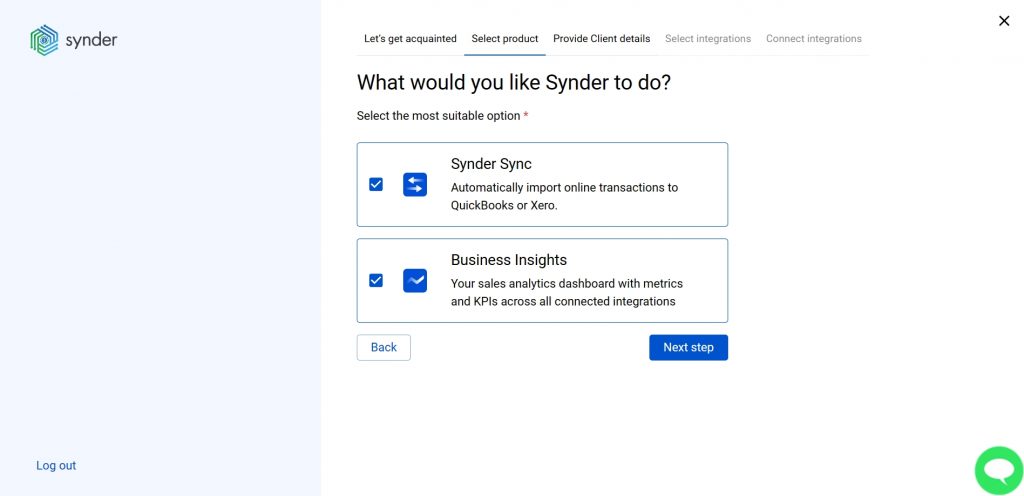
Synder Sync: choose this product to push all of your transaction data from all sales channels into QuickBooks Online, QuickBooks Desktop, Xero, or Synder Books – our native accounting solution.
Business Insights: this Synder product lets you see how your business is doing. It aggregates data across all of your connected sales channels and payment gateways and provides you with timely insights into your products’ performance and your customer behaviors, as well as financial health indicators such as total sales, average order value, etc. The data is updated every hour!
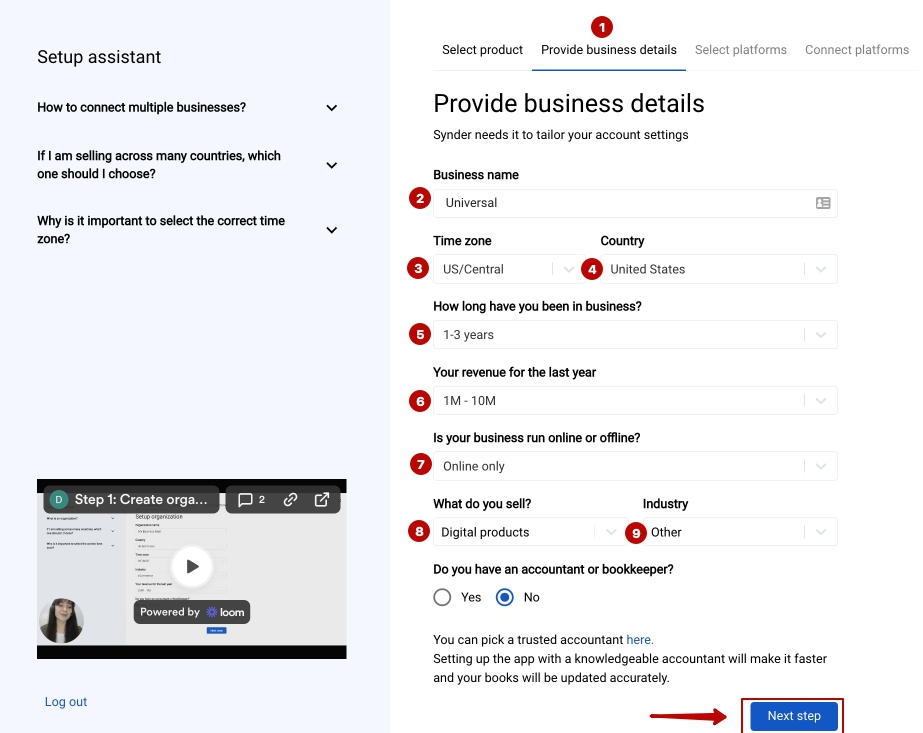
2. Set up your organization
Going through the set-up process of an Organization for your QuickBooks/Xero company or Synder Books – just fill in the information about your business and hit the Next step button.
3. Select the platforms you would like to integrate
Now you need to select sales platforms you would like to integrate with Synder. Select PayPal and other platforms (click View all processors to see the list of all available platforms).
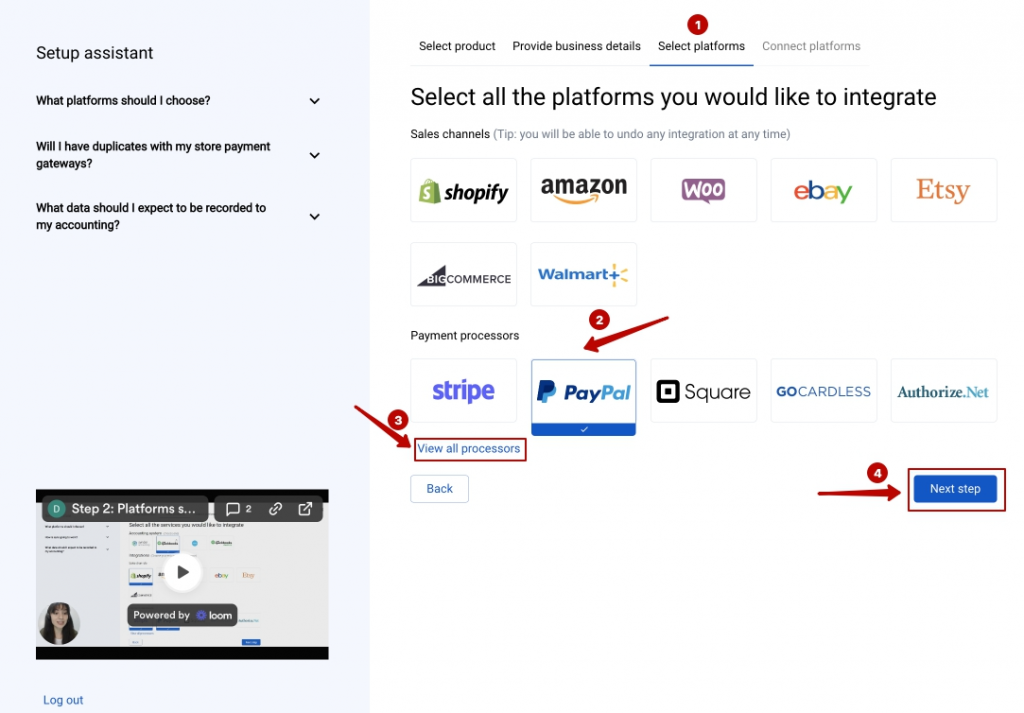
Note: Select all the services you are using to receive payments. You will be able to connect all of them right away or skip the connection of particular integrations and set them up any time later.
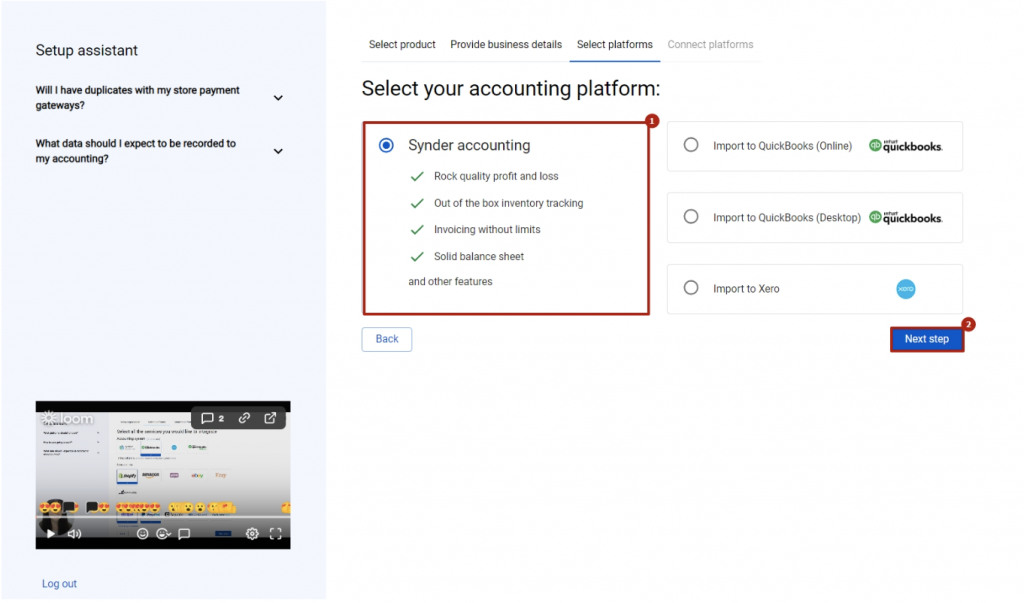
4. Connect your accounting platform
Select your QuickBooks Online or Xero company by clicking on the Connect button and grant permission to the software to record data in your QuickBooks or Xero company or proceed with our own Synder Books.
Note 1: if you are a QuickBooks Desktop user, check out this video tutorial to learn How to connect and sync data into QuickBooks Desktop.
Note 2: check out this guide if you would like to integrate QuickBooks Online or Xero.
If you’re going to connect Synder Books, follow the steps on the screen to grant permission to the system
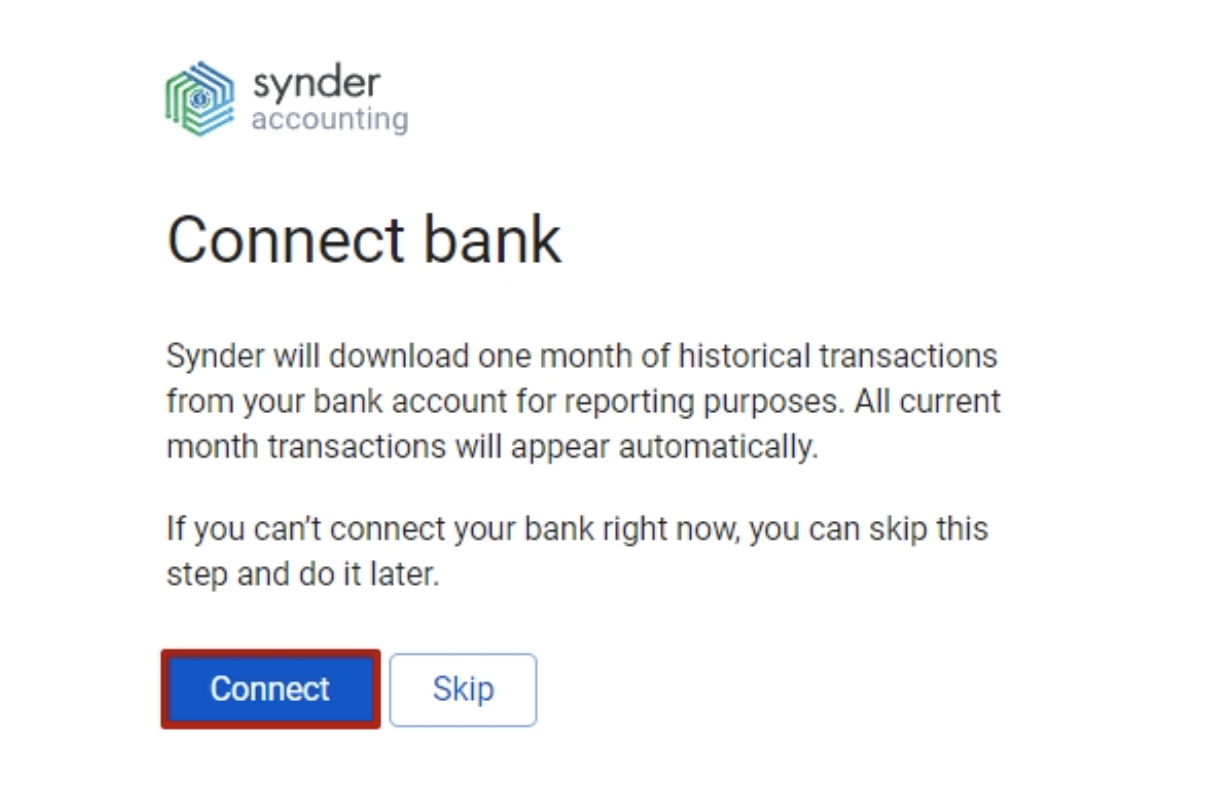
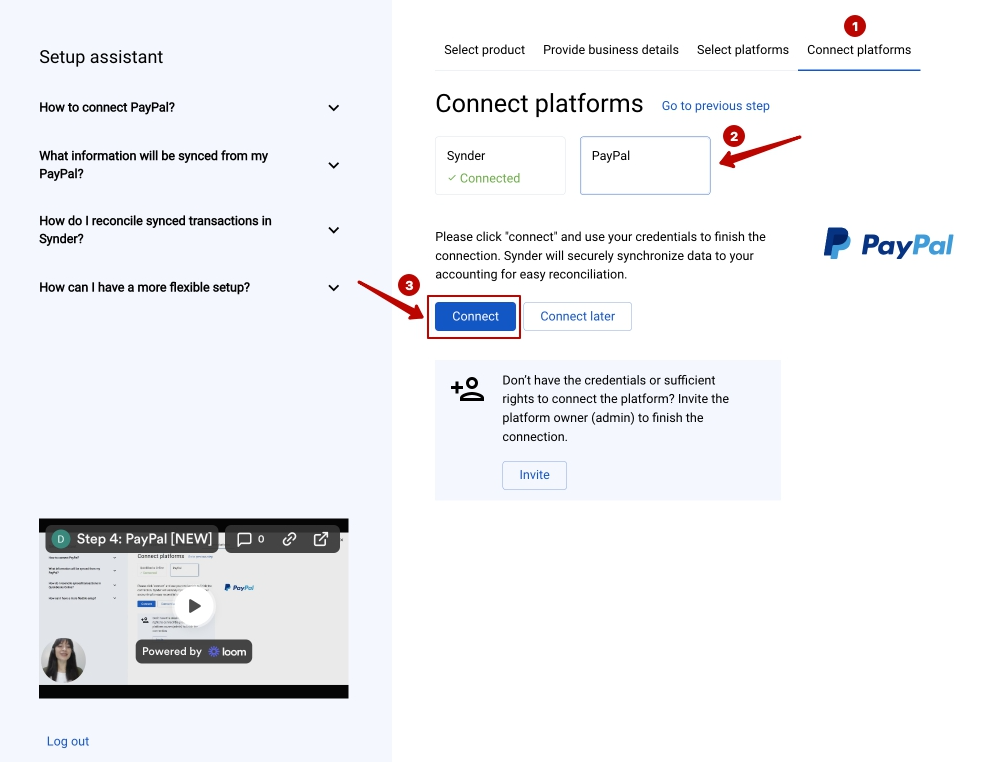
5. Connect your PayPal account
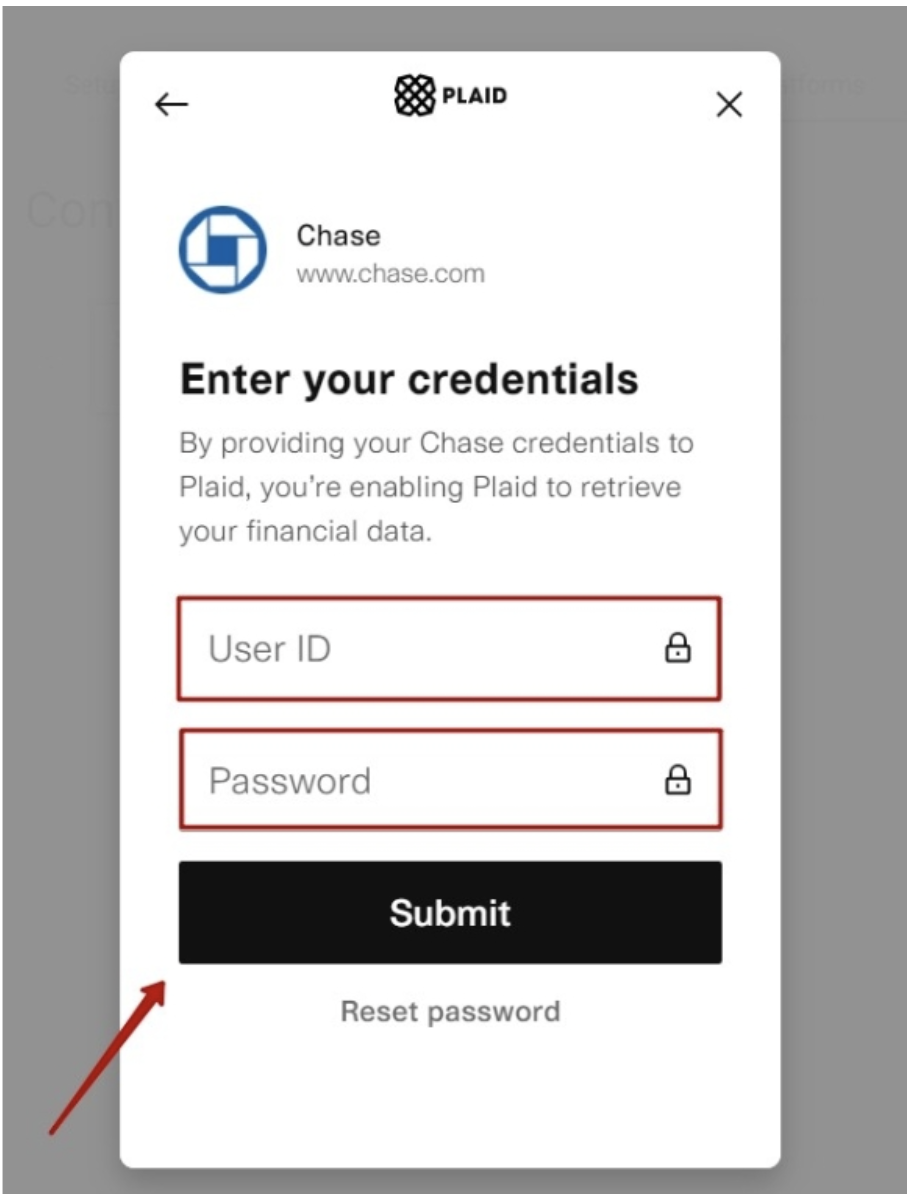
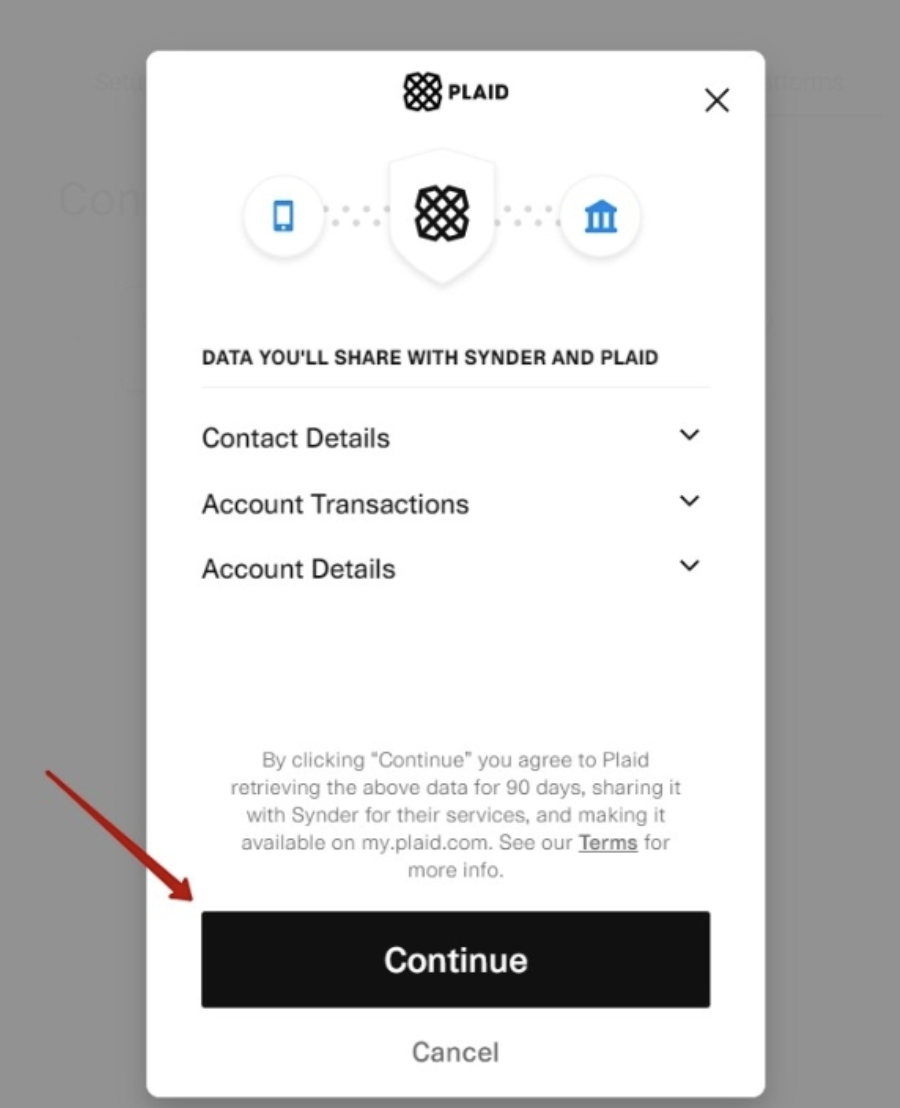
Almost there! To complete the setup you just need to connect your PayPal account and other sales platforms, if any, to Synder. You can integrate them one by one straight away following the steps on the screen: just hit the Connect button → grant permission to Synder:
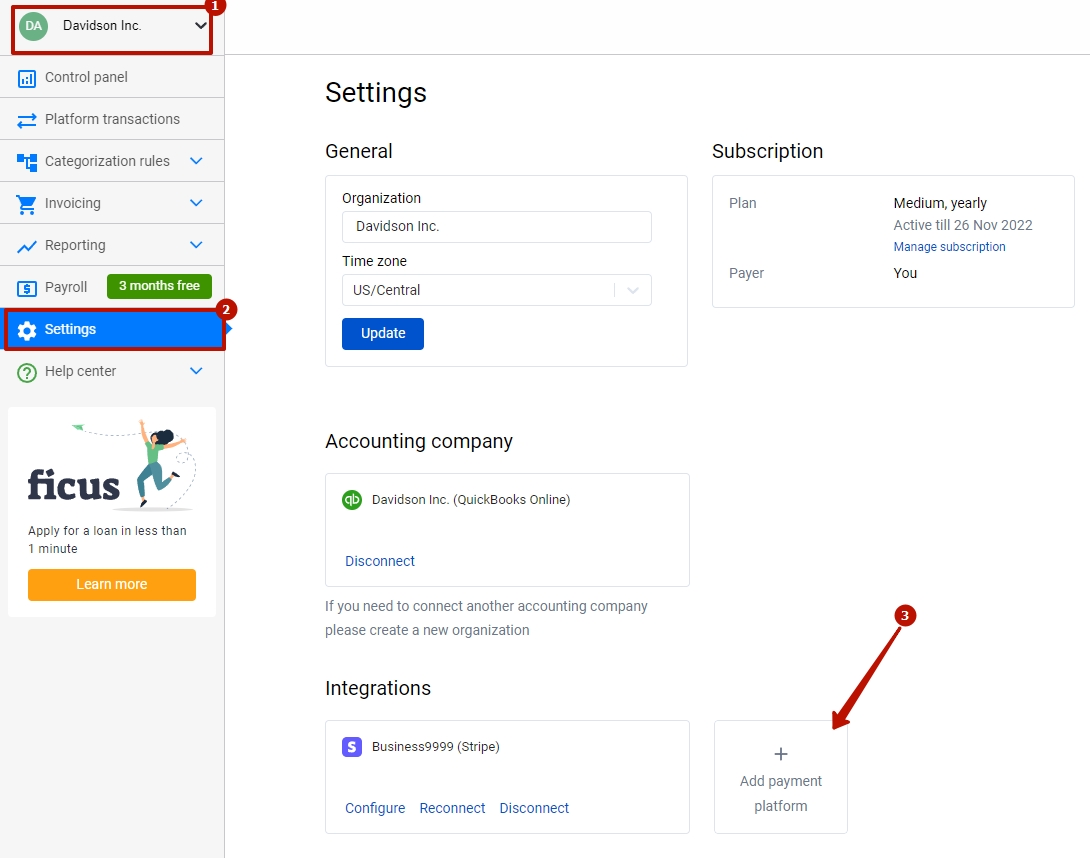
Alternatively, you can skip the connection and set them up later in the Settings: tap the Gear button on the left side menu → hit the Add payment platform button.
Note: You can find our detailed guides on how to connect your sales channels and payment providers to Synder accounting, QuickBooks Online/Xero via Synder in our Help center.
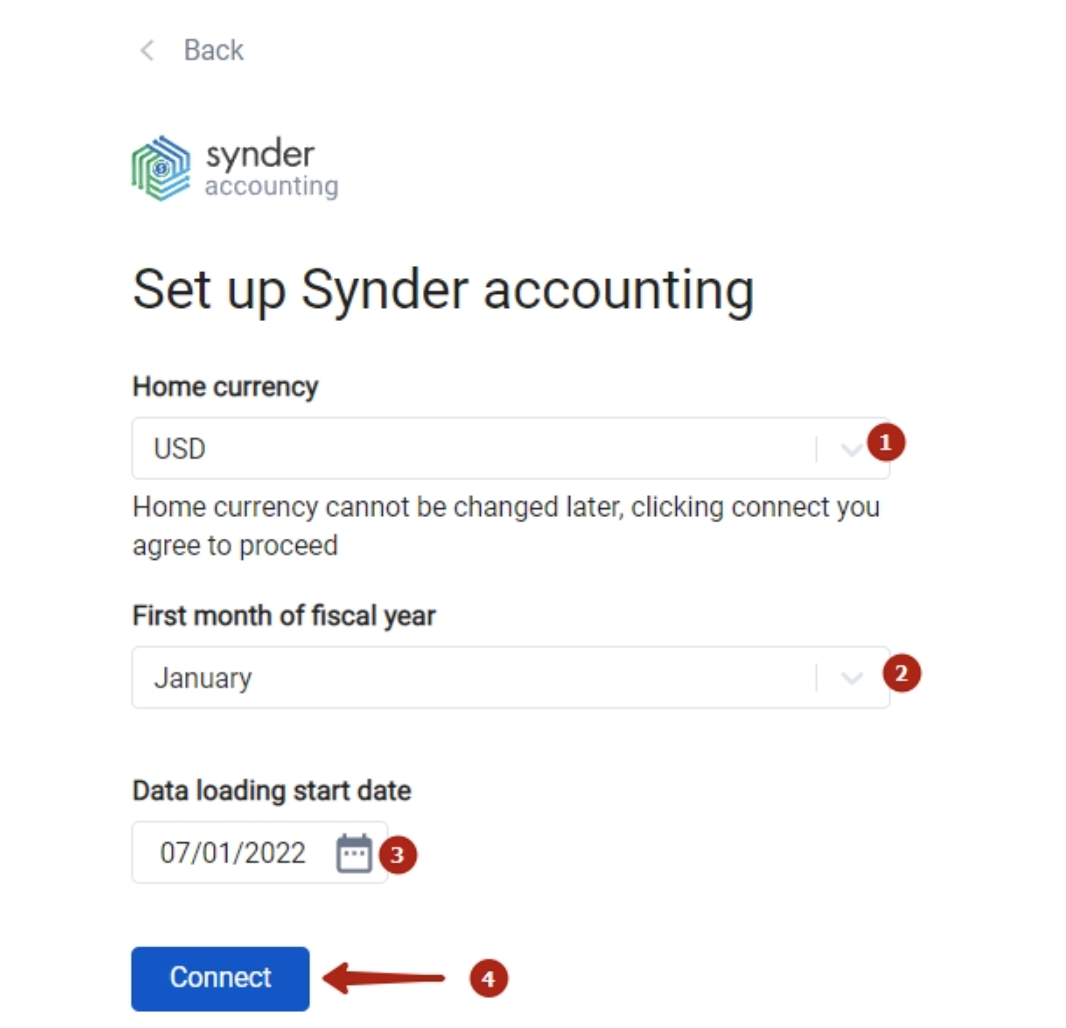
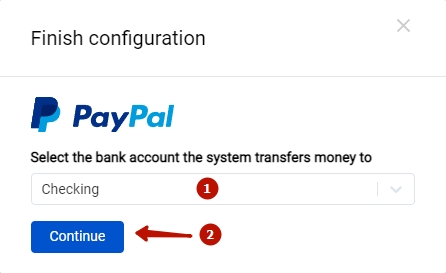
6. Set up the PayPal integration
To complete the setup for the PayPal integration, choose an account for payouts (usually, your Checking account) that will allow smooth reconciliation of your PayPal transactions in one click. Hit Continue to finish the configuration.
Connect PayPal to an already existing account
1. Switch to the needed Organization in the top-left corner of the Synder page.
2. Navigate to Settings on the left-side menu.
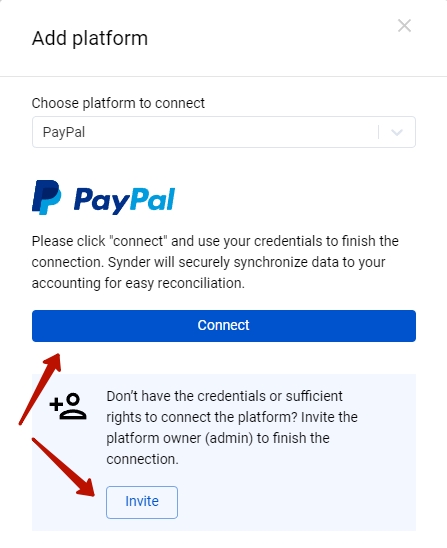
3. In the Integrations section and click Add payment platform – > select PayPal in the dropdown and hit the Connect button.
4. To complete the setup for the PayPal integration, choose an account for payouts (usually, your Checking account) that will allow smooth reconciliation of your PayPal transactions in one click. Hit Continue to finish the configuration.
Tips and tricks on the PayPal integration
Note 1. If you have a bank account for only one currency in your accounting software and you sync transactions in multiple currencies, the exchange rate is taken from the accounting software side, not from PayPal due to the PayPal API restriction (API is like a language apps use to talk with each other).
Note 2. Due to agreements with specific states in the USA, PayPal collects taxes on your behalf. However, these taxes are still to be accounted for in your books, as they are associated with your business. Synder will handle it properly and record all the details, including taxes. Check out this article on how taxes withheld by PayPal are processed with Synder for more details.
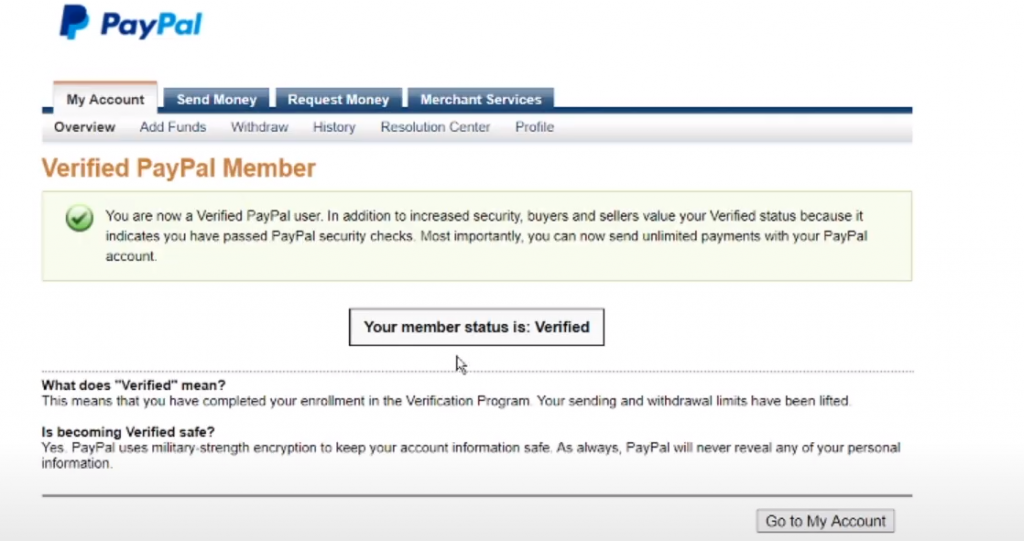
Note 3. Your PayPal account should be verified and confirmed. Only when both these conditions are met, is it possible to connect PayPal to Synder. To check this, please follow these three steps:
- Log in to your PayPal.
- Check the status by following this link.
- If your account is yet to be verified, you will be redirected to your PayPal balance page. If the account is already verified, you will see the Your member status: verified inscription.
Bravo, you have set up the integration between PayPal and Synder!
Bravo, you have set up the integration between PayPal and Synder! If you feel like some adjustments are necessary, you can manage that in Synder settings. Open them on the left menu → hit the Configure button under your PayPal platform. If you need to fill in gaps with missing data after the sync into QuickBooks Online, like applying classes or locations to transactions, the Smart Rules feature will be of great service. Now, you can customize Synder according to your needs.
Get in touch with the Synder team via online chat, phone, or email with any questions you might have so far – we are always happy to help you!
Hi, I am a QuickBooks Proadvisor and I have a lot of customers who sell things online through PayPal & Shopify but need their specific products and services they sell imported into QuickBooks from the PayPal receipt of Shopify receipt. Can Synder help with posting individual products and qty’s on each invoice in QBO?
Hello Andria, welcome to Synder community!
Yes, Synder will transfer quantities along with item names from PayPal into QuickBooks of your clients during the synchronization, so the inventory of your clients should be managed correctly. However, you need to make sure of the following to make the app will work properly for your clients:
1) Make sure Shopify really transfers item names to PayPal (Synder will take data from PayPal, not Shopify)
2) Make sure your clients’ QuickBookses have inventory items set up with item names totally identical to PayPal item names (then the app will be able to easily find items needed and apply transactions with quantities to them)
Note: if your clients don’t have inventory items set up in their QuickBooks companies yet we recommend to export items from PayPal into excel and upload items into QuickBooks with correct starting quantities. After this the app will manage inventory 100% correctly.
Thank you! Let us know if something is still unclear