The app is designed to allow for easy donation receipts generation, based on the information from QuickBooks. You can either download PDFs of the receipts or send them directly to donors’ emails in bulk.
Overview:
- Adjust the receipt format
- Import receipts from QuickBooks
- Generate receipts: email them to donors or download PDFs
Please, follow simple steps below to import and generate receipts and send them to donors:
Adjust the receipt format:
In this tab it is possible to customize your receipts design (1), change your receipts settings (2) and set your e-mail template (3).
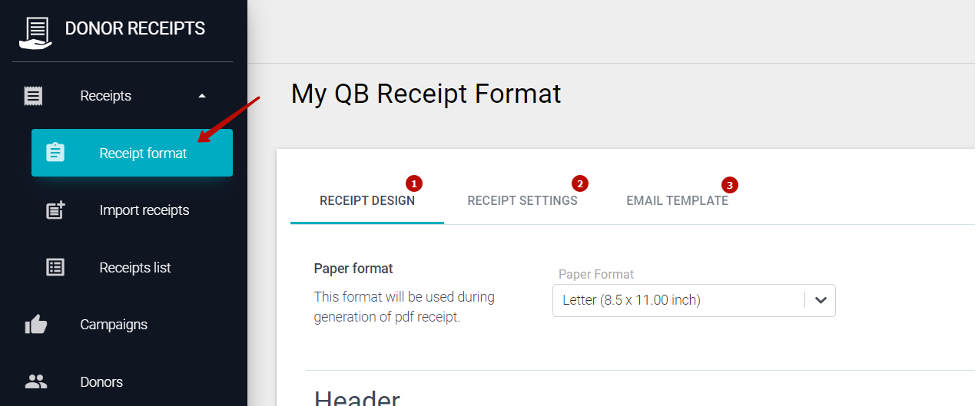
1.1. Receipt design.
This tab contains different settings, which can be applied for customization of your receipts design. Customize header, body and footer for the future PDF of the receipt. Upload the company logo, customize the text which is going to show up on the receipts and much more.
Use “Example receipt” (1) button to check how the receipt is going to look after you do some customization.
Use “Syntax helper” (2) to add specific pieces of data for a specific donor from QuickBooks. Thus “#[CompanyName]” will be replaced with the actual name of the QuickBooks company, “#[StartDate]” – with the start date of the period for receipts generation, etc.
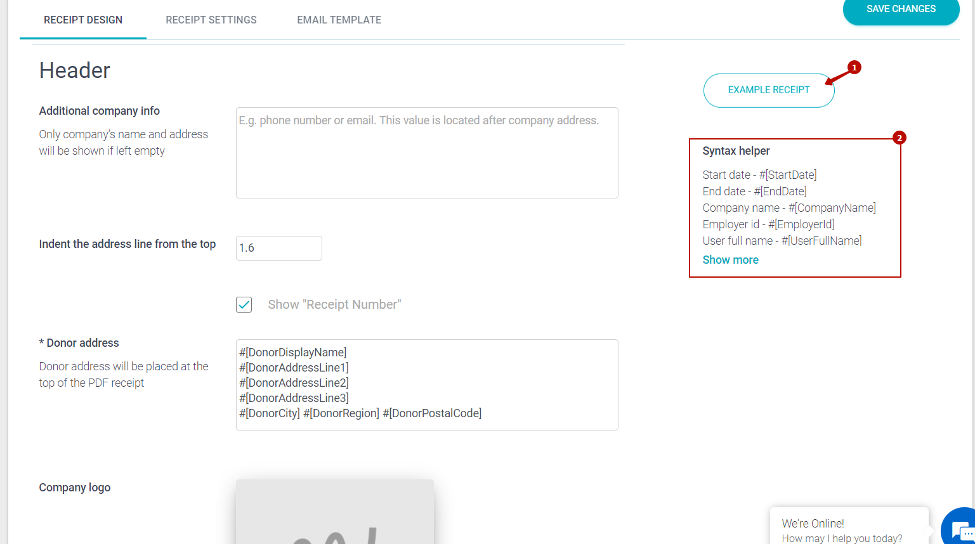
Note: After making any changes please press the ‘save changes’ button in the top right corner.
1.2 Receipt settings.
This tab is related to receipts, which you upload from your QBO to the application.
In this tab you can set:
1 – set the date format of your receipts. Note: Do not change uppercase letters MM to small ones, or “dd” to “DD”, as this may cause issues with displaying of the dates.
2 – set the receipt sequence starting number.
3 – Include unpaid invoices into your receipt list (as opposed to only paid invoices by default)
4 – choose to include Journal Entries for the donor if needed
5 – the app will get a donor address from a transaction (Invoice, Sales Receipt etc). If a transaction address doesn’t set, app will get an address from the donor profile.
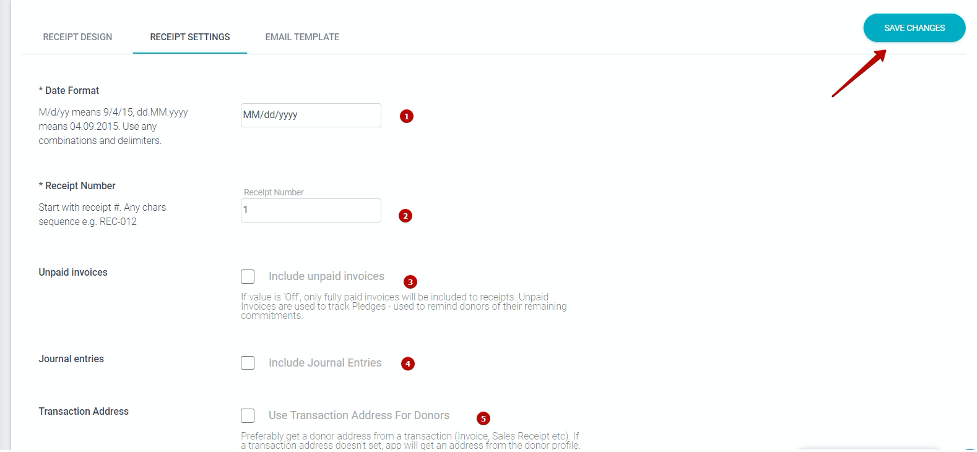
Note: After making any changes please press ‘save changes’ button in the top right corner.
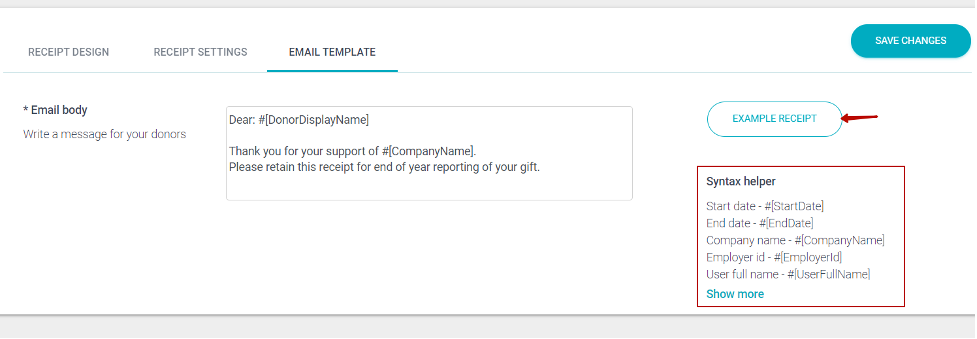
1.3. Email template.
In this tab you can write a message for your donors. It will be included directly in e-mail body which your Donors will receive. The PDF of the receipt will be attached to it.
Use already familiar “Example Receipt” and “Syntax helper” to check how the receipt attached is going to look and include the needed details into the email (like #[DonorDisplayName] for donor name from QuickBooks).
2. Import receipts from QuickBooks
For importing transactions for a certain date range from a certain income account(s) choose the “Import receipts” tab. All the transactions for this time range for the accounts you select will be used to compose the donation receipt.
Here you can select:
1 – account from your QuickBooks Online which you have your donations categorized to.
Note: this should be an income account of the item (category from Profit and Loss the donations are stored at). Select several accounts one after one if you need to receive receipts from several accounts.
2 – date interval OR
3 – specific time period.
4 – after you set required parameters please press the “Import receipts” button. It will import data from your QuickBooks to the app and will provide you with the list of the readymade donation receipts.
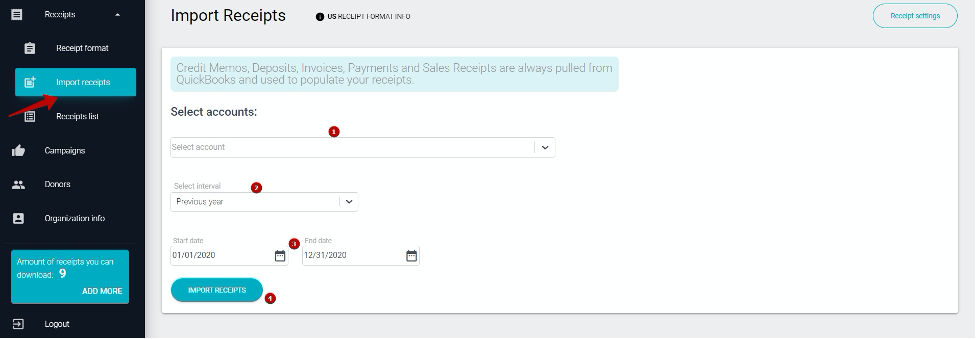
Note: Credit Memos, Deposits, Invoices, Payments and Sales Receipts are always pulled from QuickBooks and used to populate your receipts.
Important: Refunds are not included in the list of available transactions right now, the possibility to add it is under investigation. Feel free to use Credit Memo instead.
3. Generate receipts: email them to donors or download PDFs
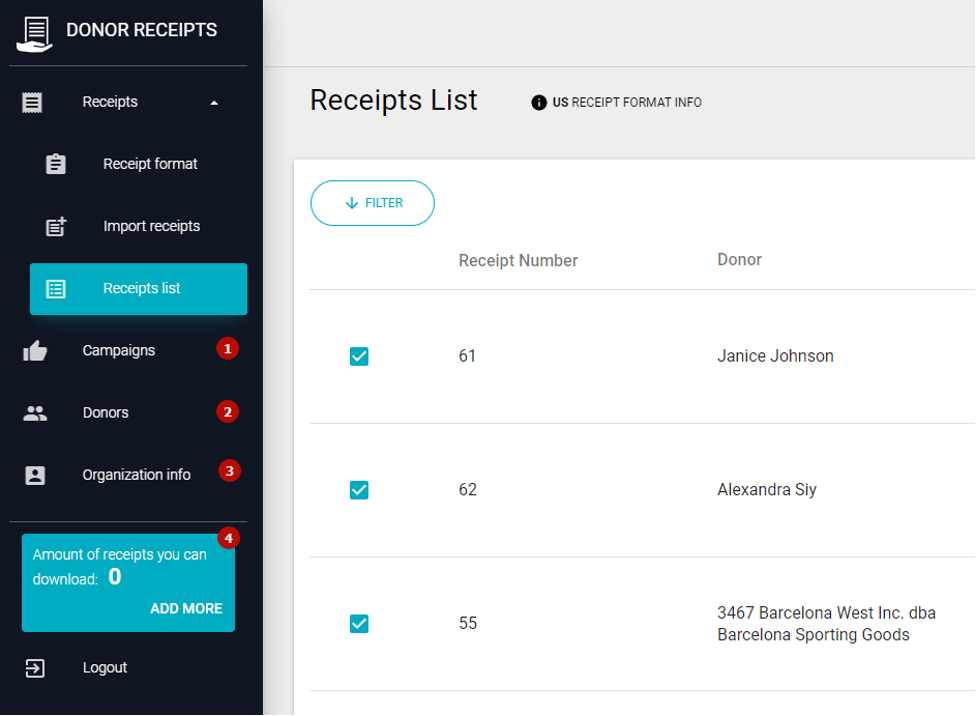
Once you imported receipts from your QuickBooks based on the receipt formas you set, you will see the list of the receipts available for sending out to your donors.
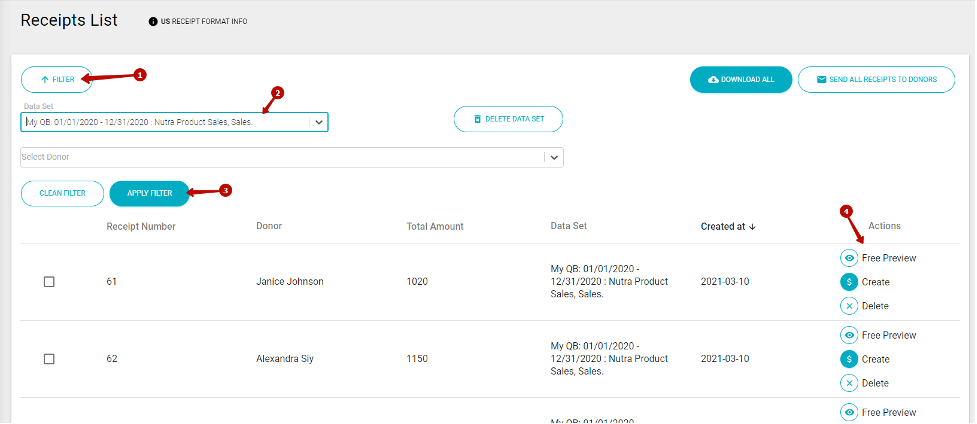
You will see the list of downloaded receipts. Each import will create a separate dataset, so if you do not like the way receipts look you can simply delete the data set, change receipt forman and import receipts again. Use filters to navigate between data sets:
1 – click filter
2 – select the data set needed
3 – click Apply Filter.
Once you do so you will be able to see only receipts for this data set ( or you can either delete a data set selected)
4 – Use “free preview” button to see how the final receipt is going to look. You will not be charged for using this option.
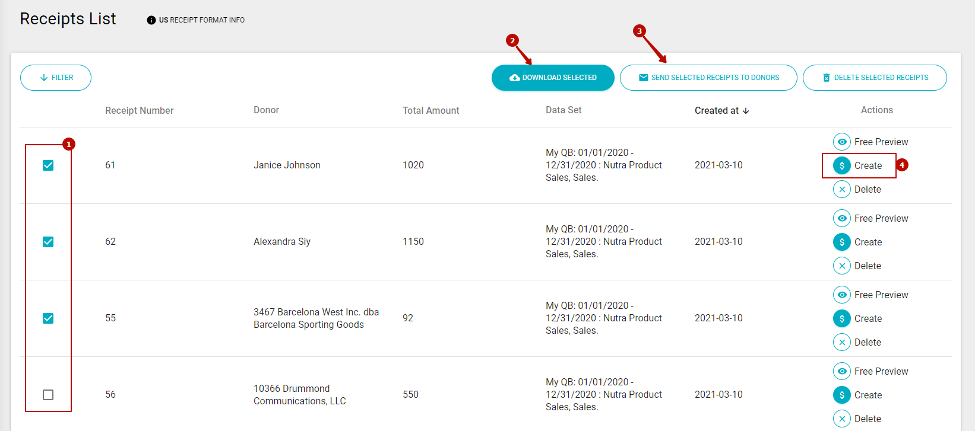
Using the receipts list you will be able to download the PDFs or send the receipt to Donors:
1 – Use the selections if you would like to send out several receipts, as opposed to ALL downloaded receipts.
2 – download PDFs of selected receipts. You will receive an email from the app with the selected receipts attached all in one file (archived).
3 – send selected receipt to donors
4 – please note: as long as the receipt in the list says “create” under Actions column, that means that you were not charged for this receipt. Once you create a receipt (by either downloading it or sending it to the donor), the app will charge your balance and the receipt action will change to “download”.
To verify if everything is fine before you are charged please use “free preview” button.
4. Other tabs.
In tab Campaigns (1) you can create a crowdfunding campaign to collect donations. Generate the payment link, set the goal and use it to run your donation campaign.
In tab Donors (2) you are able to create and see a list of donors you have.
Organization info tab (3) shows actual info about your QBO company (also here you can change it).
In tab number 4 for you can see your actual credit balance and also you can buy more credits.
If you have any questions, contact the support team using contacts specified in the footer of the page.
Comments open